|
This baby may look like a normal, two-ponytail white babe to you, but in fact she is any baby you want her to be. your imagination and ability to use LNZPro are the only limits to what she can be. She can be... 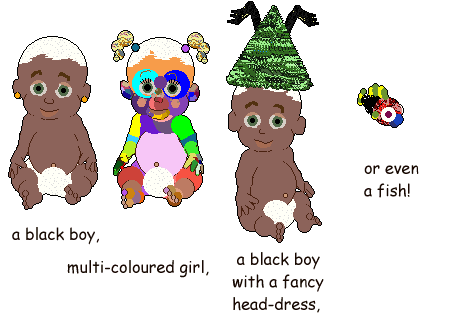
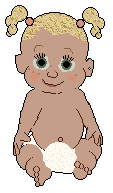
Each of the babes in the above picture is the exact same baby, after having been edited for about 5 minutes in LNZPro. It really is simple, once you get the hang of it! She/he looked a little surprised on each return from Grandma's House, but is still a happy babe :-)
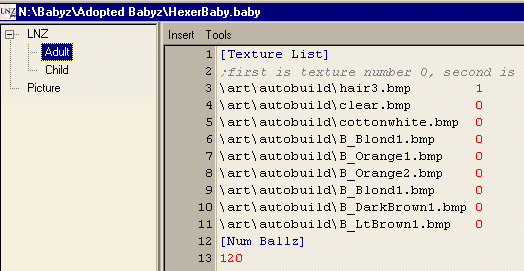
So, here's a little explanation of what you see when you open this baby into LNZPro 3.2. First of all, open LNZPro and drag and drop Hexerbaby.baby onto it. Here's what you'll see:
The lines that are in dark blue are very important. These are the Key Texts, and the game takes careful note of the data, in red, which lies beneath each one. Of the stuff in black which you'll see here and there, all you really need to worry about in this ready-made base baby is the list of .bmp files under the [Texture List] Key Text. As I've tried to point out in the file, and in various tutorials, the first texture listed is texture number 0. Texture number 3 is the 4th texture listed, B_Blond1.bmp, and in this baby happens to be the texture of her hair. You can change that, and you can change the texture number for any given ball in its Texture column.
Further down in the [Add Ball] section, you'll see ;Hair138.
If you are making a baby with growing hair, you need your [Add Ball] section to be exactly the same in the Adult and Child section Except that you would make the ballz a minus-number size in the Child section and, perhaps, change the x,y,z co-ordinates of them so as to be inside the head before it starts to grow. Note that the baby itself will be a "grower" if you change the [Default Scales] in the Child to something like 75 and 75. Look at the other Key Text sections in simiar detail, and you'll begin to understand how your baby is put together. Simply put, the [Ballz Info] section is where the main balls of your baby are, [Move] is where you can shift their positions if you wish, the [Paint Ball] section is where you have freckles, spots, belly-buttons, and hair on head etc, and the [Polygons] section is used to make smooth areas (in the case of default babyz, the inside of the mouth). They all have column headers to help you. See my LNZ beakdown chunks if you want to see a better analysis of these, and other, sections Enjoy! Carolyn Horn
|
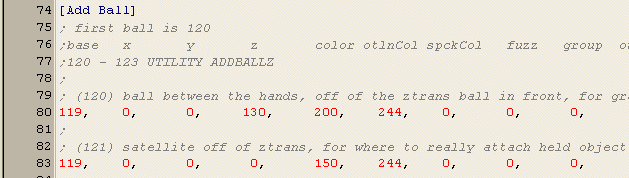 The lines that are in grey are ignored by the game but are very useful to the hexer. Each grey line starts with a semi-colon, and is worth your while reading. Take these, for instance, under the [Add Ball] Key Text. See the line which starts ;base x y etc? That line is actually column headers. If you look down each column from the header, you will see a number for each line of code. So the first number in each line of code is the number of the base ball to which your added ball is being made relevant. the 2nd, 3rd, 4th are the x, y, z co-ordinates of the added ball relevant to the base ball, and so on. If you look along the "column headers" you'll see that there is one for Texture -- this column is where you put your chosen texture number for each ball. You can get multi-textured ponytails etc that way.